


 8.1 Installing Remote
Access Server


 8.1 Installing Remote
Access Server
The Remote Access Server can be set up for many different configurations:
Figure 47 shows you the most typical setup for Remote Access Services; connecting a remote workstation to a LAN.
If the installation process has been successfully completed, you will have a LAN Distance Remote Access folder on the desktop. Open it to see the contents. In the folder, there is a IBM Remote Access program object. Double click on it to launch the LAN Distance Services. In the application, there is an icon representing your workstation. By default, this icon is called MyWorkstation (see Figure 49).
If there are other Remote Access Servers or remote workstations on the same LAN, you will also see objects representing these other workstations. If you now select the MyWorkstation icon and click with your right mouse button, you get the context menu as shown in Figure 49.
It contains a number of actions to manipulate the configuration of the Remote Access Service:
The required privilege for this function is USER.
The required privilege for this function is USER.
The settings notebook can be opened by any user. On a secure workstation, the settings notebook displays only the tabs that are granted to the user who opens the notebook. For example, the notebook includes only the information tab for a user. If an administrator opens the notebook, all of the tabs, except Security, will be available.
You can view and work with all of your changes while the notebook is open and when you close the settings notebook, choose whether to accept or to delete the changes you made. Configuration changes that you make in the settings notebook or in its imbedded notebooks are not saved until you close the settings notebook.
The required privilege for this function is USER.
The required privilege for this function is USER.
On a secure workstation, the tracking notebook displays only the tabs that are granted to the user who opens the notebook. For example, a user cannot access an audit log, so the audit tab is not displayed for a user.
Before Remote Access Services can be used, it must to be configured (see
Figure 50). The following steps must be completed to
configure a basic Remote Access Services server to provide access to a single
remote workstation.
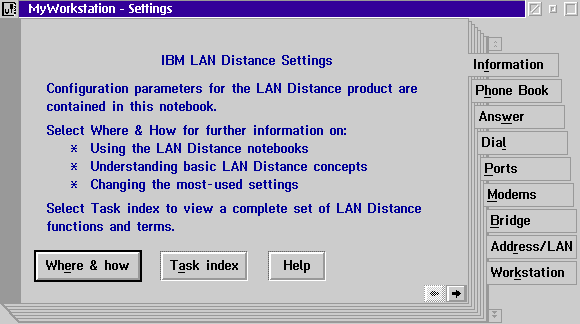
Figure 50: Lan Distance Settings Screen
The Wide Area Network (WAN) port is the path that
Remote Access Services will use to communicate with the remote workstations. It
is the access point for connections to and from a server.
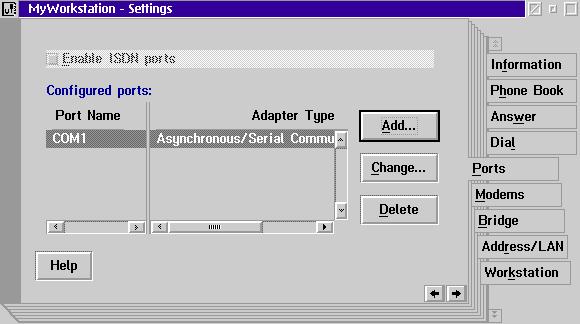
Figure 51: LAN Distance Ports Settings
Prior to using a modem, it must be configured and
attached to a WAN port (see Figure 52).
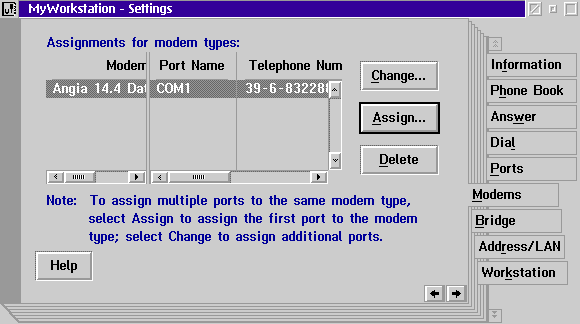
Figure 52: LAN Distance Modem Setup
The Remote Access Services Bridge is located on the
Connection Server and is used to route LAN frames between remote workstations
in the WAN and the LAN. In a token ring network, this bridge functions as a
source routing bridge like the IBM Token-Ring Bridge Program. In a Ethernet
network the bridge functions as a transparent bridge, you can only use the same
type of networks together (see Figure 53).
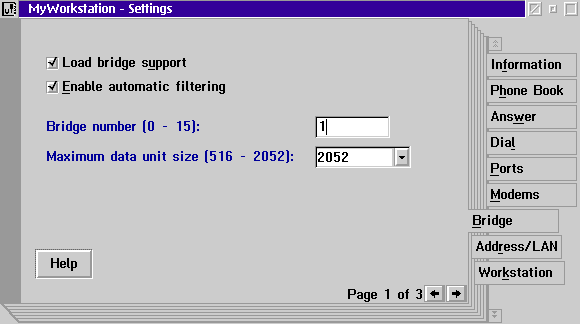
Figure 53: LAN Distance Bridge Setup
The Remote Access Services server acts as a bridge between two LAN segments.
In order for a bridge to operate, it must route frames between the two adapters
connected to each LAN segment. The WAN segment and LAN adapter connected to it
are logical devices. Although the adapter is a logical device, it must still
have an adapter address (see Figure 54).
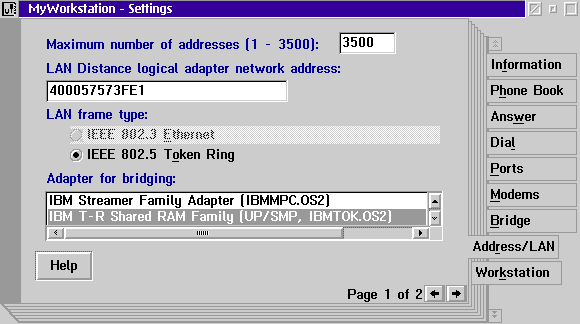
Figure 54: Address/LAN Settings for LAN Distance
Before the Remote Access Service can start to receive incoming calls from
remote workstations, it must be properly set up. Answering modes can be set up
on a set of different criteria (see Figure 55).
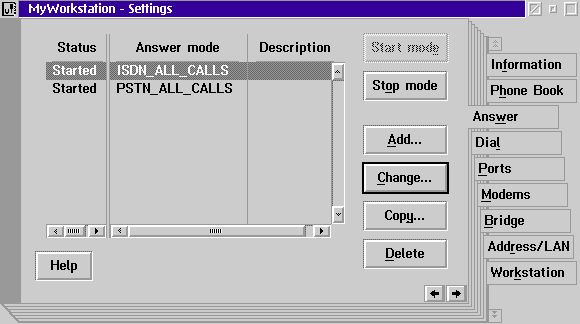
Figure 55: Answer Modes for LAN Distance
When Remote Access Services is installed, the name that appears is
MyWorkstation. This name should be changed to something that will help
you to identify the server (see Figure 56).
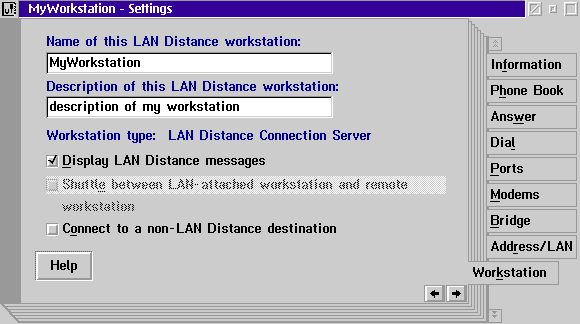
Figure 56: MyWorkstation Settings for LAN Distance
The Phone Book is normally used on a remote workstation to provide a list of
Connection Servers that a remote workstation can contact. A User is defined in
the Phone Book section since we need the User entry later to setup the security
Callback feature. The Phone Book is also used on the Connection Server to allow
call back security for users, or to call other remote workstations (see
Figure 57).
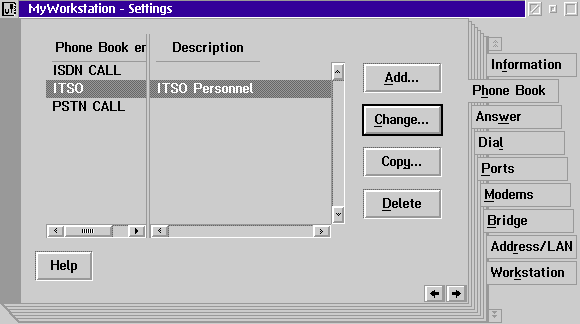
Figure 57: Lan Distance Phone Book settings
The Remote Access Services Installation process adds both the Remote Access
Services Logical Adapter for the WAN connection and the real network adapter in
LAN Adapter and Protocol Support (LAPS). LAPS must to be reconfigured, as
requested by the MyWorkstation setup (see Figure 58).
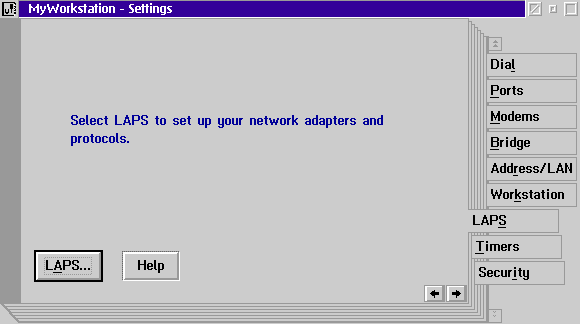
Figure 58: Lan Distance Settings
When you have properly configured all the above-mentioned processes, Remote Access Services is ready to accept incoming calls from remote workstations to the local LAN.
Some changes for Remote Access Services require you to stop and restart the service. Other changes require a complete reboot of your workstation. Please follow the instructions that you receive on your screen.
Reboot your workstation, and before starting the Connection Server, check that the modem is up and running.