


 Chapter 5. Introduction
The File and Print services component of OS/2 Warp Server is a local area network (LAN) application that is functionally very similar to OS/2 LAN Server 4.0. It allows you to share hardware and software resources on the server with the other users on the LAN. You can share directories, the applications contained in them, printers, and serial devices like modems or plotters that are connected to a server workstation. These shared resources are also referred to as network resources.
To install the File and Print Server:
You will be prompted with the 'Welcome to the Installation/Configuration' panel.
You will be prompted with the Installation/Configuration dialog box as shown
in Figure 36.
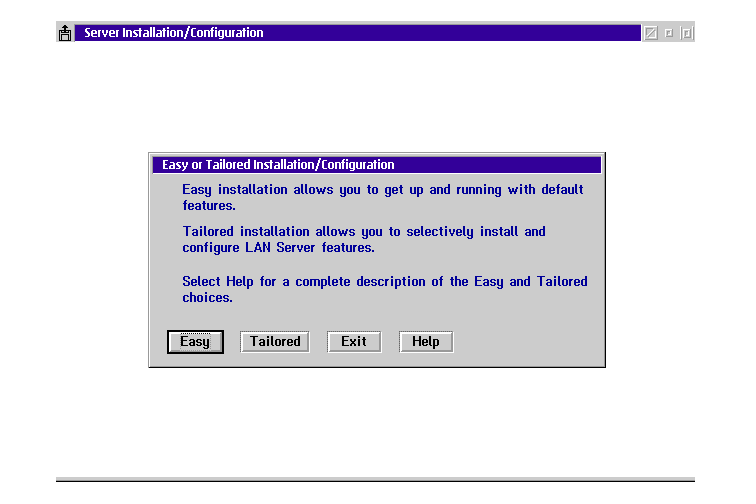
Figure 36: Installation/Configuration Dialog Box
An installation location screen will appear. You have to select a drive for installing the File and Print Server.
You will be prompted with a Server Type screen.
| Note: |
|---|
|
LAN Server needs you to define network adapters and protocols. This is done in MPTS (Multi Protocol Transport Services). MPTS consists of two main components: Network Adapter and Protocol Support provides:
Sockets/MPTS provides underlying protocols:
|
Since OS/2 Warp 4 includes a later version of MPTS than Warp Server it is
advisable to use the version that is automatically installed with the operating
system. The installation program will detect the more recent version that is
already on the system and request your confirmation to use it as shown in
Figure 36.
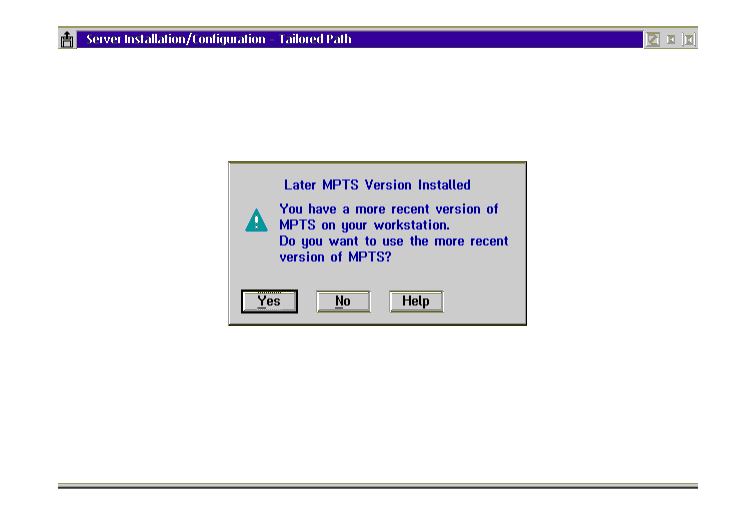
Figure 37: Dialog Box - Later MPTS Version
The Adapter and Protocol Configuration window appears (see Figure 38).
The File and Print Server usually uses the IBM NETBIOS protocol (NETBEUI). It is also possible to use IBM NETBIOS over TCP/IP (TCPBEUI). If you choose this protocol, you must also install TCP/IP. You can use NETBEUI and TCPBEUI at the same time, but you have to assign them different protocol numbers.
IEEE 802.2 is only necessary if you plan to use the
remote IPL services of LAN Server or for CM/2. If you do
not select it, there will be a warning message upon exiting the configuration
window.
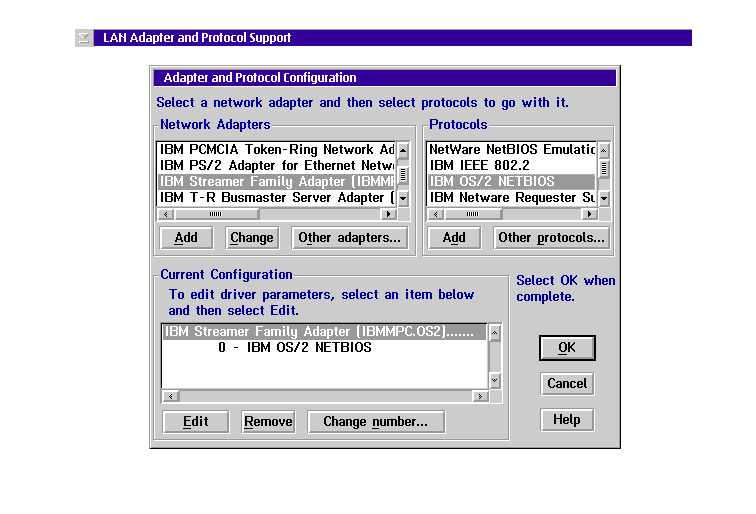
Figure 38: Adapter and Protocol Configuration
In some cases it may be desirable to define a Locally Administered Address (LAA). To do this, follow the steps below:
A configuration window appears.
Now the MPTS configuration is finished.
| Note: |
|---|
|
Most common adapters can be found in the window under Network Adapters. If your adapter is not listed here you must make it known to MPTS. Do this by clicking on Other adapters... and inserting the diskette with the OS/2 NDIS driver that comes with your adapter. |
You will now be prompted with the 'Installation and Configuration' dialog
box, as shown in Figure 39.
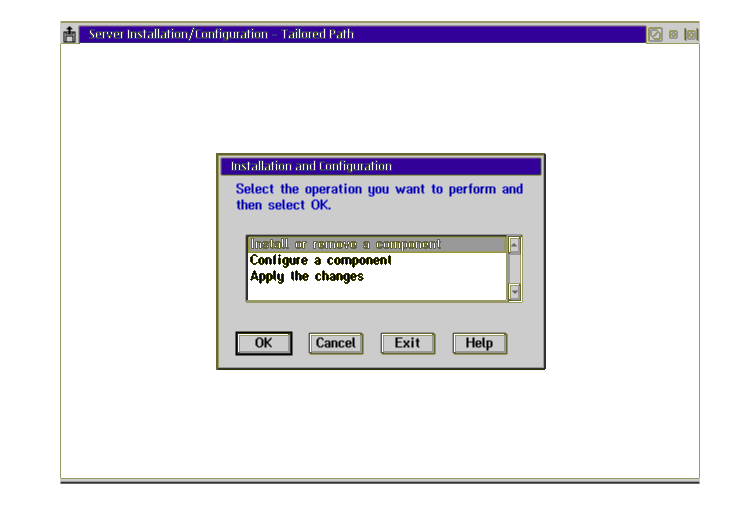
Figure 39: Installation and Configuration Panel
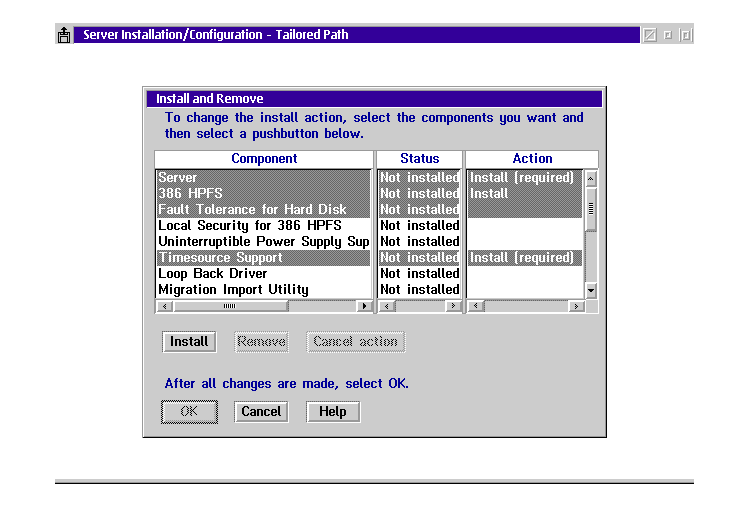
The Install and Remove component windows appears (see Figure 40). In this panel you are requested to select the components that you wish to install on your system. In the Action column you can see that some of these components are mandatory.
You will now be positioned on the Configure a component selection of the window shown in Figure 39.
The installation and configuration process will now proceed, it will first install the requester and then the server. When it is finished, you will be prompted with a File Backup screen, with the information that the CONFIG.SYS and the PROTOCOL.INI have been backed up prior to their modification.
The system will take a few minutes to complete the configuration.
To make the configuration effective, you must:
After rebooting, you can see that the File and Print Server is now installed.
| NOTE |
|---|
|
This is only valid for the OS/2 Warp Server Advanced! Before you reboot your system you must edit your CONFIG.SYS and add the CACHE386.EXE statement. You must add the following line: RUN=C:\IBMLAN\NETPROG\CACHE386.EXE Save and close your CONFIG.SYS. If you forget to add this line to your CONFIG.SYS you'll get the following error message when starting your File and Print Server: Net 3091: the CACHE386.exe is not running, The server cannot be started. Temporarily, you can start CACHE386.EXE manually from a command prompt before starting the server. |